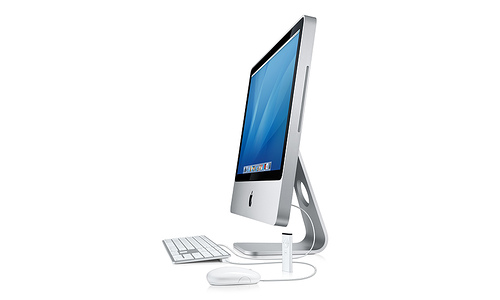
Let me guess – you got your new iMac. You had a recent Time Machine backup on your Time Capsule. Setting up the new iMac was ridiculously easy — just point to the backup. A few hours later, your new iMac is just like your old Mac, right down to the wall paper and browser history. You shake your head in disbelief and say to yourself, “Man, this thing just works! This is the way it is supposed to be!”
A couple of days later, you fire up your iPhoto. It says it needs to update the database or whatever. No sweat. Just a couple of minutes — the new iMac is ridiculously fast. Hullo — what is wrong with the last four events? How come they have no photos in them? Well, actually, they do have something, you can see the thumbnails for a second, and then they disappear. The events seem to have the right number of photos. They even list the camera model and exposure data.
You scratch your head and say to yourself, “Well, may be the Time Machine backup didn’t unpack properly or whatever. May be the version upgrade messed up some data. No sweat. I can use the Time Machine and find the right iPhoto Library.” You fire up the Time Machine — probably for the first time for real. You restore the last good backup of the iPhoto Library to your desktop, and launch iPhoto again. Database update again. Anxious wait. Hey, the damned events are still missing.
Panic begins to set in. Mad Google for answers. Ok, hold down the Option and Command keys, and launch iPhoto. Regenerate thumbnails. Repair the library. Rebuild the Database. Still, the ****** events refuse to come back.
How do I know all this? Because this is exactly what I did. I was lucky though. I managed to recover the events. It dawned on me that the problem was not with the restore process, nor the version update of iPhoto. It was the Time Machine backup process — the backup was incomplete. I had the old Mac and the old iPhoto library intact. So I copied the old library over to the new iMac (directly, over the network; not from the Time Machine backup). I then started iPhoto on the new machine. After the necessary database update, all the events and photos showed up. Phew!
So what exactly went wrong? It appears that Time Machine doesn’t backup the iPhoto Library properly if iPhoto is open (according to Apple). More precisely, the recently imported photos and events may not get backed up. This bug (or “feature”) was reported earlier and discussed in detail.
I thought I would share my experience here because it was important piece of information and might save somebody some time, and possibly some valuable photos. And I feel it is disingenuous of Apple to tout the Time Machine as the mother of all backup solutions with this glaring bug. After all, your photos are among the most precious of your data. If they are not backed up and migrated properly, why bother with Time Machine at all?
To recap:
- If you find your photo collection incomplete after migrating to your shiny new iMac (using a Time Machine backup), don’t panic if you still have your old Mac.
- Exit gracefully from iPhoto on both the machines.
- Copy your old iPhoto Library from the old Mac over to the new one, after properly exiting from iPhoto on both machines.
- Restart iPhoto on the new Mac and enjoy.
How to prevent this from happening
Before the final Time Machine backup from your old Mac, ensure that iPhoto is not running. In fact, it may be worth exiting from all applications before taking the final snapshot.
If you want to be doubly sure, consider another automated backup solution just for your iPhoto Library. I use Carbon Copy Cloner.


 Quit applications that may be indexing the file system. Dropbox, QuickSilver etc. Find them on your menu bar. Right click on the icons and select Quit.
 Ensure that Finder is not set to show all size. Open a Finder window, hit Cmd-J to bring up these options, and ensure that the Calculate All Sizes is not ticked (despite the fact that it is shown ticked in the screenshot here).
 The last thing to try is to kill and relaunch Finder. Click on the Apple logo on any menu bar, select “Force Quit…” to bring up the window show, select Finder and hit the Relaunch button